Virtuals Launches Agent Token Offerings on Solana: A Complete Official Guide
Author: Virtuals Protocol
Compiled by: TechFlow
TechFlow Summary: Virtuals Protocol has released a comprehensive operational guide for founders, step-by-step illustrating how to issue Agent tokens on Solana. The content covers identity and team setup, choosing instant or scheduled issuance, core tokenomics (Automated Capital Formation (ACF) and Pre-buy), anti-sniper tax / fee delegation / issuing as an Agent, and other advanced configurations. It also provides three recommended schemes for early experimentation, structured fundraising, and builder support, along with post-issuance details such as trading fees, graduation, liquidity, and LP lock mechanisms.

We created this guide for founders who want a comprehensive overview: a visual, step-by-step guide to issuing a Solana Agent token from the first click to final configuration. It explains every setting, when to use each module, and how to build the right issuance plan for your project.
What This Guide Covers
- Launch: Identity, project info, and team setup.
- Instant or Scheduled Launch: How to choose the right launch timing.
- Core Tokenomics: Automated capital formation and Pre-buy.
- Advanced Configuration: Anti-sniper tax, fee delegation, and issuing as an Agent.
- Recommended Launch Schemes: Recommended configurations for different founder scenarios.
- Review Your Launch: What to verify before going live.
- Post-Launch Overview: Trading fees, graduation, liquidity, and LP locking.
- Full Video Demonstration: Walk through the complete launch process with our co-founder.
Getting Started
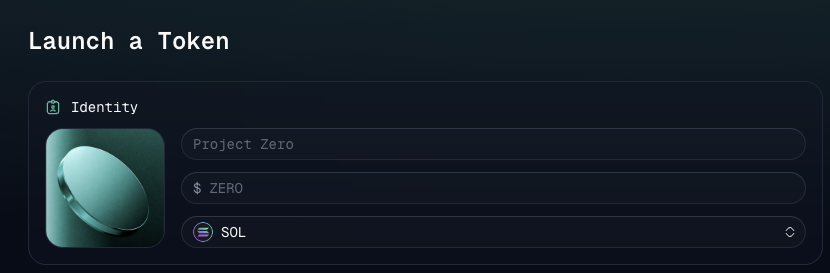
Navigate to app.virtuals.io, connect your wallet, and select Issue Token in the top right corner.
Under Identity:
- Upload your token logo.
- Enter the token name.
- Select the token ticker.
- Select SOL.
- Add a project description and social links (optional).
- Add founders and key contributors.
Instant vs. Scheduled Launch?
You can use the same issuance modules whether you launch immediately or schedule it for later. Scheduling simply changes when the launch occurs.
Ideal for Instant Launch:
- Your tokenomics and project information are finalized.
- Your community is ready.
- You want trading to begin immediately after creation.
Ideal for Scheduled Launch:
- You want time to announce and market the launch.
- Partners or the community need coordination.
- You want users to review the public offering page first.
- The launch is tied to a specific campaign, event, or product release.
Choosing the Right Module
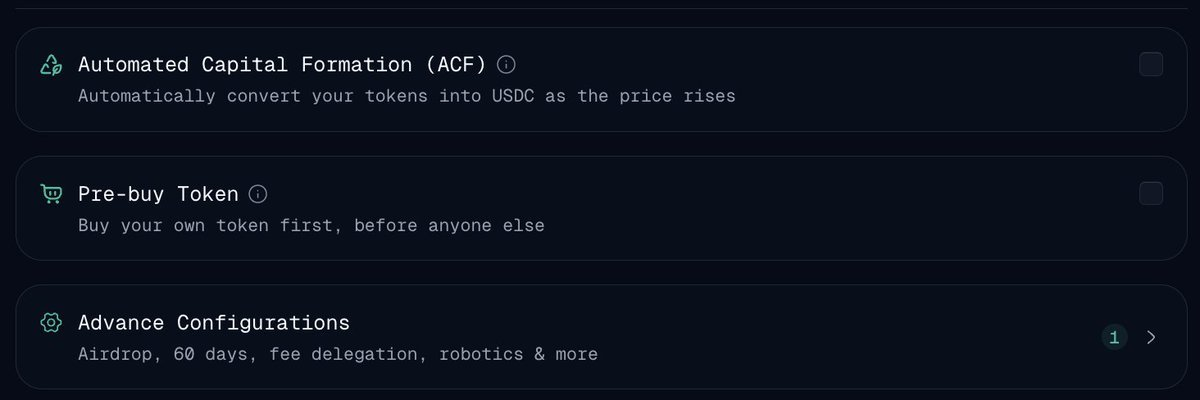
Automated Capital Formation (ACF)
Use Case: Your project needs to raise funds as it grows without conducting large-scale upfront token sales.
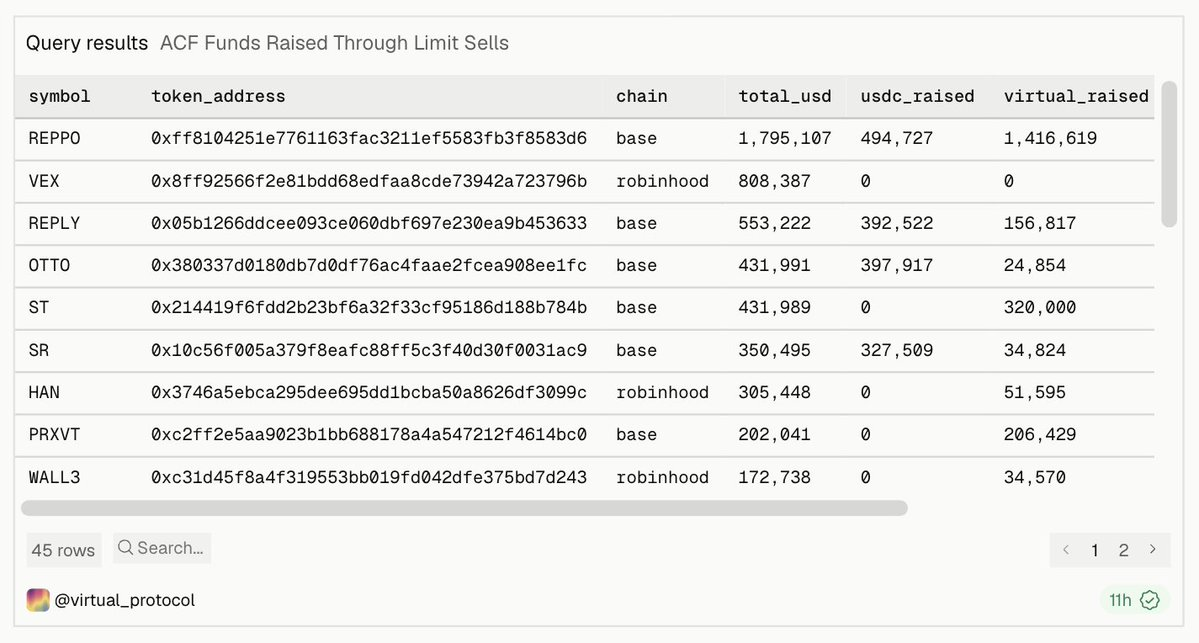
ACF converts a portion of the project's token allocation into stablecoins through separate, valuation-specific liquidity pools as the token grows from a $2M to a $160M FDV. Since ACF does not sell directly into the main trading pool, founders can raise funds without creating direct selling pressure on the primary chart.
As of August 24, 2026, ACF alone has raised over $6.8M cumulatively for Agents on Virtuals Protocol.
Pre-buy Tokens
Use Case: The founding team wants to purchase their own tokens before public trading begins.
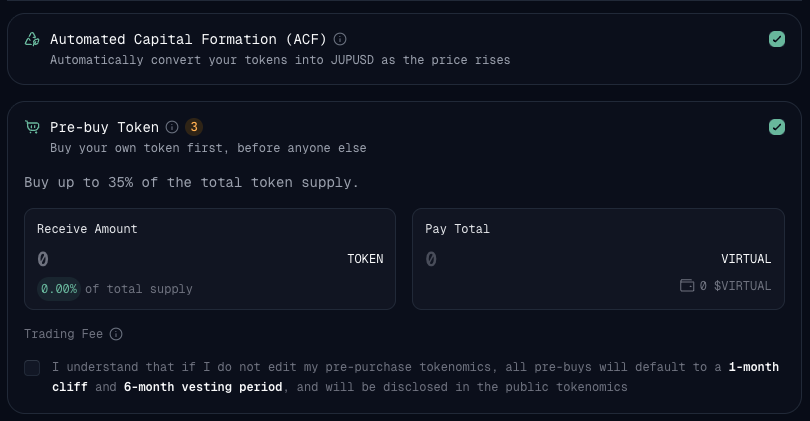
On Solana, launches trade via a Meteora DBC pool, with a portion reserved for migration upon graduation. Therefore, the Pre-buy cap depends on your ACF settings:
- With ACF enabled: 35% of the supply is in the DBC pool before graduation, 15% is reserved for migration, and the team can Pre-buy up to 35%.
- With ACF disabled: 83.15% of the supply is in the DBC pool before graduation, 16.85% is reserved for migration, and the team can Pre-buy up to 83.15%.
Allocation details are publicly disclosed, allowing traders to see team participation before the launch.
Pre-buy helps founders establish their position, demonstrate confidence, and avoid having to buy their own allocation only after public trading begins.
Custom Pre-buy Tokenomics
- After entering the Pre-buy amount:
- Locate Team Initial Buy under the token allocation on the right.
- Toggle it on and select Add Allocation.
- Enter the allocation name, description, and amount.
- Add the wallet address and token allocation for each recipient.
- Under Release Schedule, select Add Unlock to configure the token vesting timeline.
- Ensure all allocations are assigned, then save.
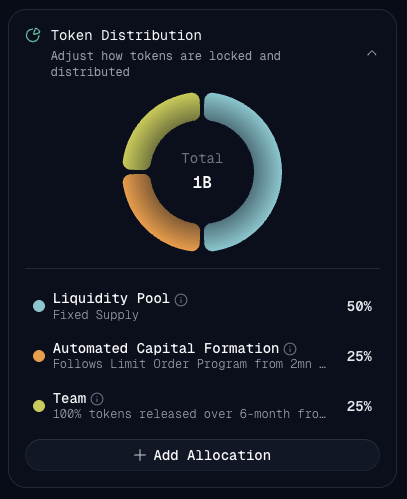
If founders do not customize these settings, Pre-buy defaults to a 1-month cliff followed by a 6-month unlock period.
Allocations, recipients, and vesting schedules are publicly disclosed within the token's economics.
Advanced Configuration
After configuring the main tokenomics, open Advanced Configuration to access additional launch protections, allocations, experiments, delegations, bot, and Economy OS settings.
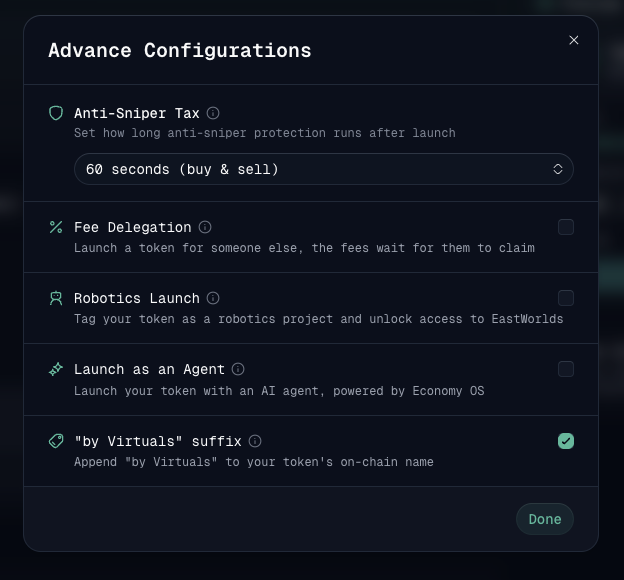
Modules are arranged in the following order.
Anti-Sniper Tax
Use Case: You want to protect the token's early market from bots, speculative sniping, or immediate dumps.
Anti-sniper protection applies a steep launch tax on both buys and sells, preventing bots from acquiring cheap tokens at launch. The tax gradually decreases to 1% over a selected window: 60 seconds, 10 minutes, or 98 minutes, or can be turned off entirely.
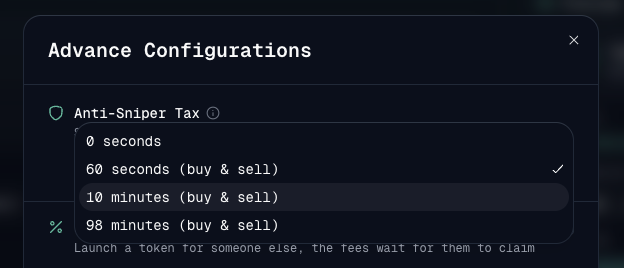
All taxes collected during the protection window are used to repurchase Agent tokens and are returned to the team wallet.
Fee Delegation
Use Case: You want to issue a token on behalf of builders you trust.
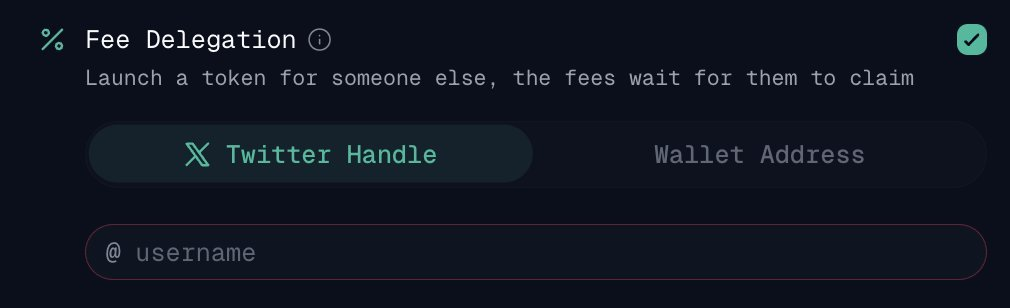
Fee delegation allows you to issue a token for another builder without requiring their permission or wallet connection.
As the token trades, the builder's share of trading fees automatically accumulates into a reserved balance specifically for them. They can watch this balance grow, and once they log into Virtuals and claim their profile, the accumulated fees become theirs.
Bot Issuance
Use Case: The project is centered around a physical robot product or form factor.
Enabling this option marks the token as a bot project. Traders browsing Virtuals can identify it immediately, and investors focused on robotics can discover the project more easily.
Issue as an Agent
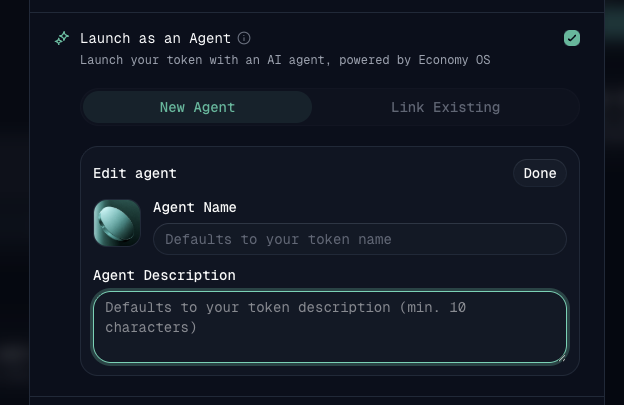
Use Case: You want to issue the token alongside an AI Agent powered by Economy OS.
When enabled, the token will be issued alongside its dedicated AI Agent—a fully configured economic participant with its own wallet, email, and card.
Powered by Economy OS, the Agent can:
- Earn revenue by selling services.
- Hire other Agents.
- Trade autonomously.
- Directly receive income generated from token trading fees into its wallet.
Founders can choose to Create New Agent or Link Existing Agent. No coding or extra setup required.
Learn more at os.virtuals.io
Recommended Launch Schemes
Early Experimentation
- Instant launch.
- Anti-sniper protection.
- Issue as an Agent (if using Economy OS).
Why it works: An instant launch gets your idea trading immediately, anti-sniper protection creates a more controlled open market, and Economy OS provides a functioning economic Agent for your project from day one.
Best for founders validating early-stage products or Agent concepts.
Structured Fundraising Launch
- Scheduled launch.
- Automated capital formation.
- Pre-buy (if the founding team wants an initial position).
- Anti-sniper protection.
- Detailed team and project information.
Why it works: ACF gives the team a transparent way to raise stablecoins as the token appreciates without dumping into the main trading pool. A scheduled launch creates time to present the project, while Pre-buy allows the team to establish publicly disclosed positions.
Best for serious teams seeking transparent, growth-based capital formation.
Builder Support Launch
- Scheduled launch.
- Fee delegation.
- Anti-sniper protection.
Why it works: Fee delegation lets you issue a token on behalf of trusted builders, with their trading fee share automatically accumulating until claimed. A scheduled launch gives the community time to review the pitch and project info, while anti-sniper protection helps reduce bot-driven activity at launch.
Best for supporters issuing tokens for builders, or teams coordinating community moments.
Review Your Preview
Before launching, verify:
- Token name and ticker.
- Solana is selected.
- Issuance wallet.
- Team members and project description.
- Instant or scheduled timing.
- Token allocations.
- Selected modules displayed under Mechanisms.
- ACF and Pre-buy allocations.
- Launch fee.
- Social links and token logo.
The preview should accurately reflect what traders will see.
What Happens After Launch?
Every launch uses the same core Virtuals infrastructure:
- The token begins trading via a Meteora DBC pool.
- A 1% trading fee applies, releasing every 2 VIRTUAL accumulated.
- 70% of trading fees go to the creator.
- 30% goes to the Virtuals treasury.
- The token graduates after accumulating 42,000 VIRTUAL.
- Upon graduation, its liquidity is automatically deployed to a public Meteora pool on Solana.
- The generated LP tokens are locked for ten years.
Watch the Full Demo
Prefer watching it in action? Watch our co-founder @everythingempty walk through the complete launch process, from selecting the right modules to configuring each one.
The demo covers the Robinhood Chain flow; the Solana flow is identical except for chain selection, the Pre-buy caps mentioned above, and graduation to Meteora.
You now have everything needed to configure tokenomics, select the right modules, and put your Agent on-chain. What are you waiting for?
Issue Your Agent Token on Solana
Join TechFlow official community to stay tuned
Telegram:https://t.me/TechFlowDaily
X (Twitter):https://x.com/TechFlowPost
X (Twitter) EN:https://x.com/BlockFlow_News
 @virtuals_io